Instructions on Using the Flow Cytometry Panel Builder Tool
Multicolor Flow Cytometry Experiments
Flow cytometry is a powerful research technique that facilitates the measurement of multiple parameters in particles such as individual cells. The detection of specific cellular markers involves the use of fluorochrome conjugated antibodies, fluorescent tags and dyes along with a flow cytometer’s optical system to generate and collect the relevant fluorescence spectra (excitation and emission spectra). While the development of high parameter cytometers has enabled more thorough phenotyping of diverse cell populations, it has also made the design of multicolor flow cytometry panels more complex.
How to Build a Multicolor Panel
When designing a multicolor flow cytometry panel, it is important to know the instrument configuration and how to optimally combine multiple fluorochromes to minimize spectral overlap. Flow cytometry panel design has traditionally been a time-consuming process involving extensive research of available reagents, evaluation of proper antibody/fluorochrome pairings, and verification of panel/cytometer compatibility. The Novus Panel Builder Tool automates this process, leading to shortened research timelines and fewer errors. Find the right products for your experiment by following the 3 easy steps below.

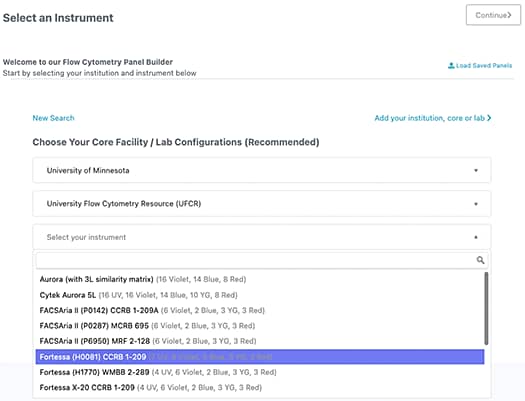
1. Select your Institution and Instrument
Institutions along with their respective flow core facilities/labs and instruments are preset in the system. If your institution and/or instrument is not available, click the add your institution, core, or lab link for further instruction. Once selected, instrument configuration will appear.
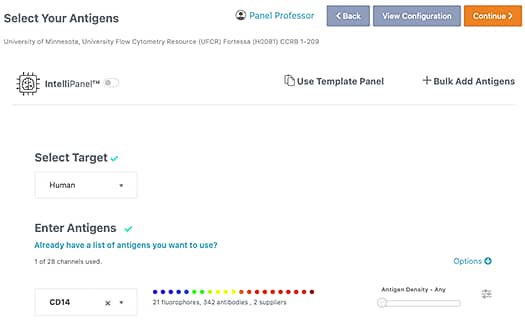
2. Select Your Antigens and Additional Reagents
First select the target species of interest, then enter your antigens. You can upload a template panel or add antigens in bulk. Refining your results by co-expression, clone and antigen density is optional but will improve fluorochrome suggestions. If you want to add an antigen or viability dye to a dump channel, toggle the option below “In Dump Channel”. *IntelliPanel™ will determine an optimal flow cytometry panel based on your antigen selections allowing you to skip the step of determining the best antibody-fluorochrome combination.
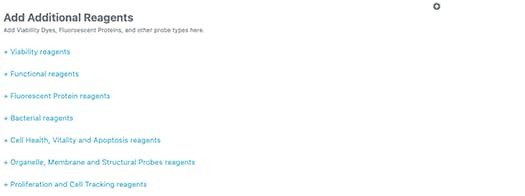
In addition to specific antigens, you can add other fluorescent reagents such as viability dyes, fluorescent proteins, and cell tracking reagents to your flow cytometry panels.
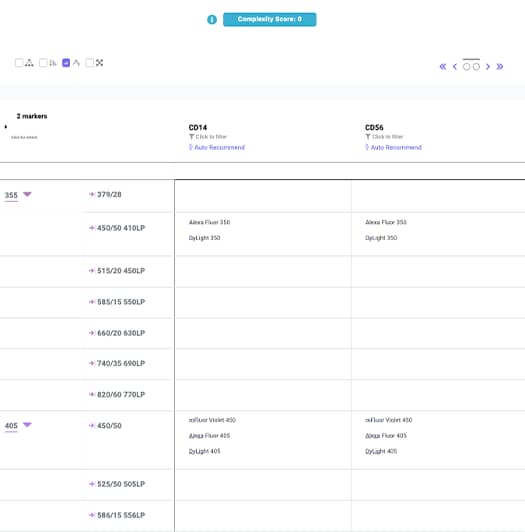
3. Select the Appropriate Products that Fit your Instrument
View products for your markers within the confines of your instrument configuration (lasers and filters) as a digital spreadsheet. The brightness of the fluorochrome is indicated by the number of colored boxes present below the fluorochrome (1-5). Order fluorochromes by checking the “Fluor Availability” box to select the channel for the markers with the least number of fluorochrome options first.
Note: Low density (expression) antigens should be paired with bright fluorochromes and high density (expression) antigens should be paired with dim fluorochromes. IntelliPanel™ will suggest an optimal conjugated antibody for your flow cytometry panel.
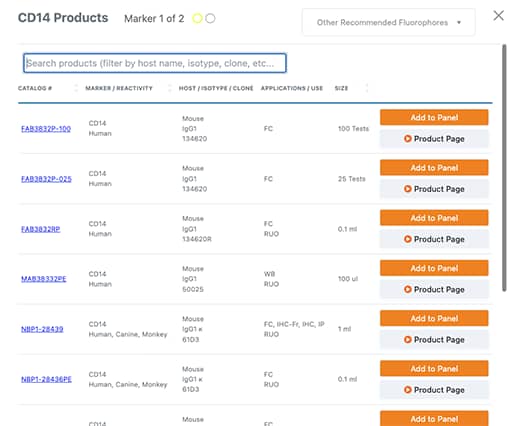
When you select a fluorochrome for a particular antigen, a popup appears displaying a list of relevant products. If you can’t find a product, please contact technical support .
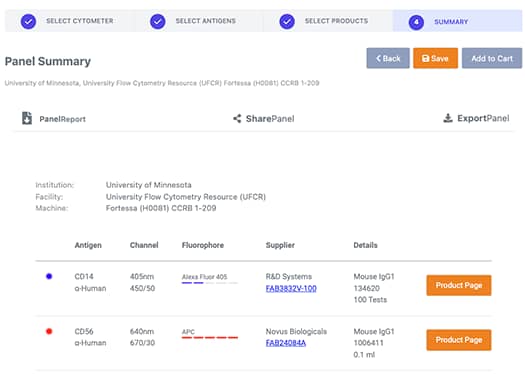
4. Panel Summary: Export, Save Your Panel, or Add to Cart
Click the add to cart button to immediately purchase your Bio-Techne reagents. You can also export your panel to review and share with lab mates. Not quite ready to purchase? Save your panel and receive a code to modify or purchase at a later date. Type in the name of the panel and your email to receive a copy of the panel and a quick reference code to enter upon return.
Tips for Multicolor Panel Design
- Utilize the full spectrum of fluorochromes permitted on your instrument. By selecting fluorochromes that span across the spectral range of the optical system, fluorescence spillover and compensation issues will be minimized. For example, consider using an antibody conjugated to Alexa 405 (Ex max = 401 nm/Em max = 421 nm) along with an antibody conjugated to DyLight 755 (Ex max = 754 nm/Em max = 776 nm).
- Match fluorochrome brightness with antigen density. In general, highly expressed antigens should be paired with dim fluorochromes whereas the brightest fluorochromes should be used for detection of lowly expressed antigens. If testing an antigen with an unknown concentration in a biological sample, start with a bright fluorochrome.
- Validate your assay with the proper controls. Experiments should include a few different controls.
- Unstained cells are used to access cellular autofluorescence, a factor contributing to false positive staining.
- Viability dyes are key for identifying and excluding dead cells from data analysis. Dead cells impact staining by nonspecifically binding antibodies and showing increased autofluorescence.
- Isotype controls and FMOs (fluorescence minus one) are important for measuring background signal. FMOs are samples that are stained for all markers in an experiment except for one and experiments should include each variation to properly set your gates.